Lab 1.4 - Build a custom field in your Salesforce org
Level: 1 Contributor basics
Time: ~15 min
You will: build US-014 the way an admin builds anything, by clicking in Salesforce Setup, and check it against real records.
The situation
You have a branch and an org. Now do the actual work. Nothing in this lab is specific to CI/CD:
this is ordinary Salesforce configuration. The only rule is where you do it: in helios-dev,
your own org, never in the shared one.
Before you start
- Lab 1.3 finished: you are on
features/US-014-panels-required - The Status section of the sfdx-hardis panel shows
helios-devas the current org
Steps
1. Open your org
In Orgs Manager, find the row whose ALIAS column says helios-dev. Read the alias, not the
address: none of the addresses says what the org is for. The Developer Edition org has an
orgfarm- string Salesforce invented, and the scratch orgs have two random words and a number, so
your four orgs look alike everywhere except in that column.
At the end of that row, click the chevron. It opens everything you can do to that org, and the first entry is Open (1).
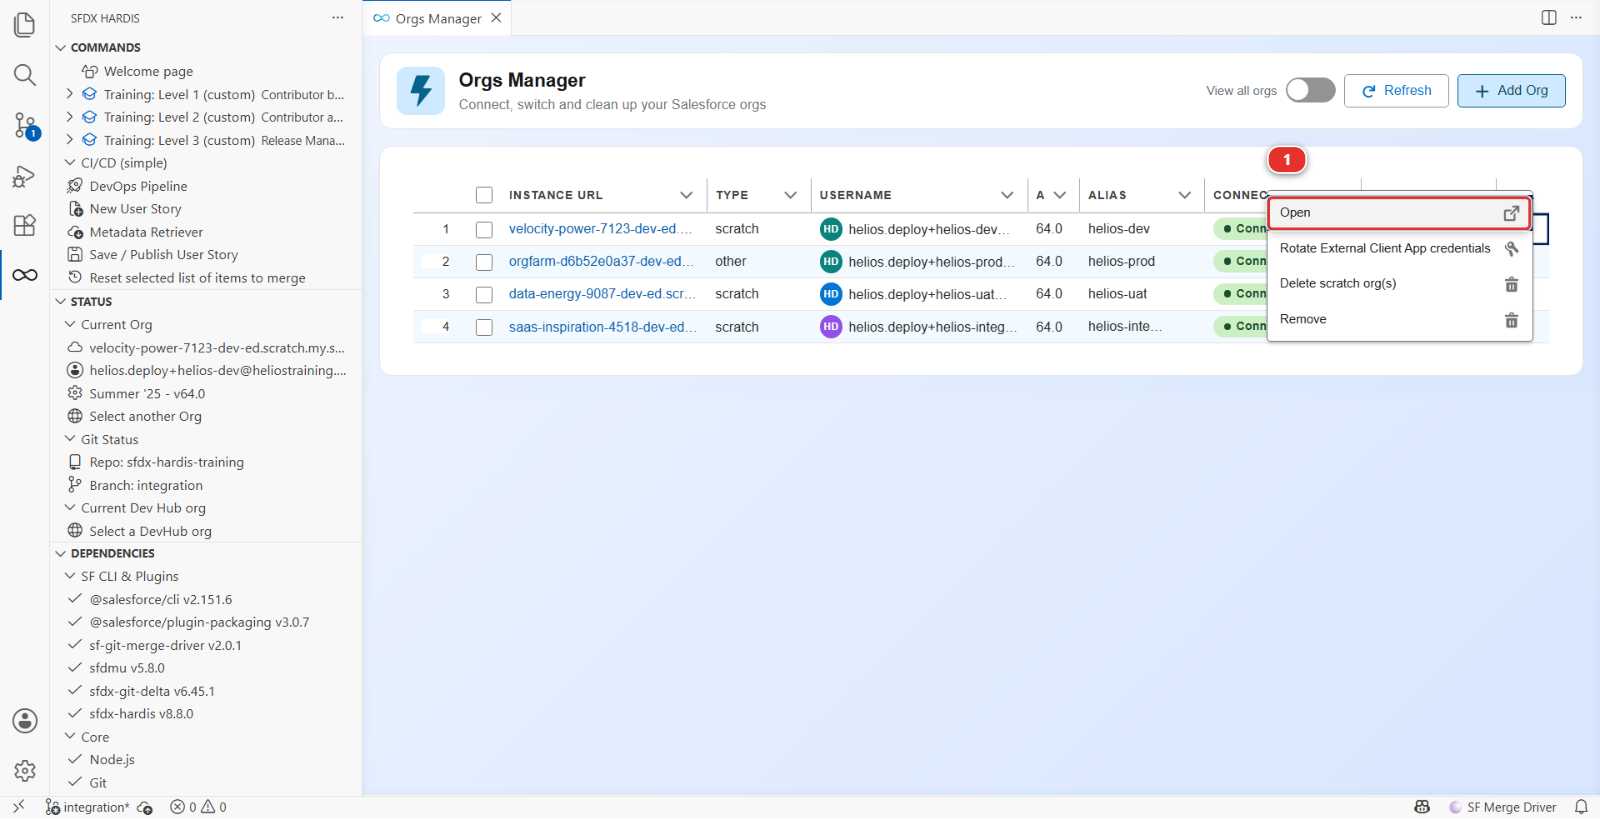
Your browser opens the org, already logged in. No password, no login page: the extension used the credential it stored when you connected the org in Lab 1.2.
Opening the org from this panel rather than from a bookmark is a habit worth forming. It is the difference between "the org I meant" and "the org that happened to be open in that tab".
2. Create the field
In Salesforce: Setup > Object Manager > Installation, then Fields & Relationships (1) in the left column, then New (2).
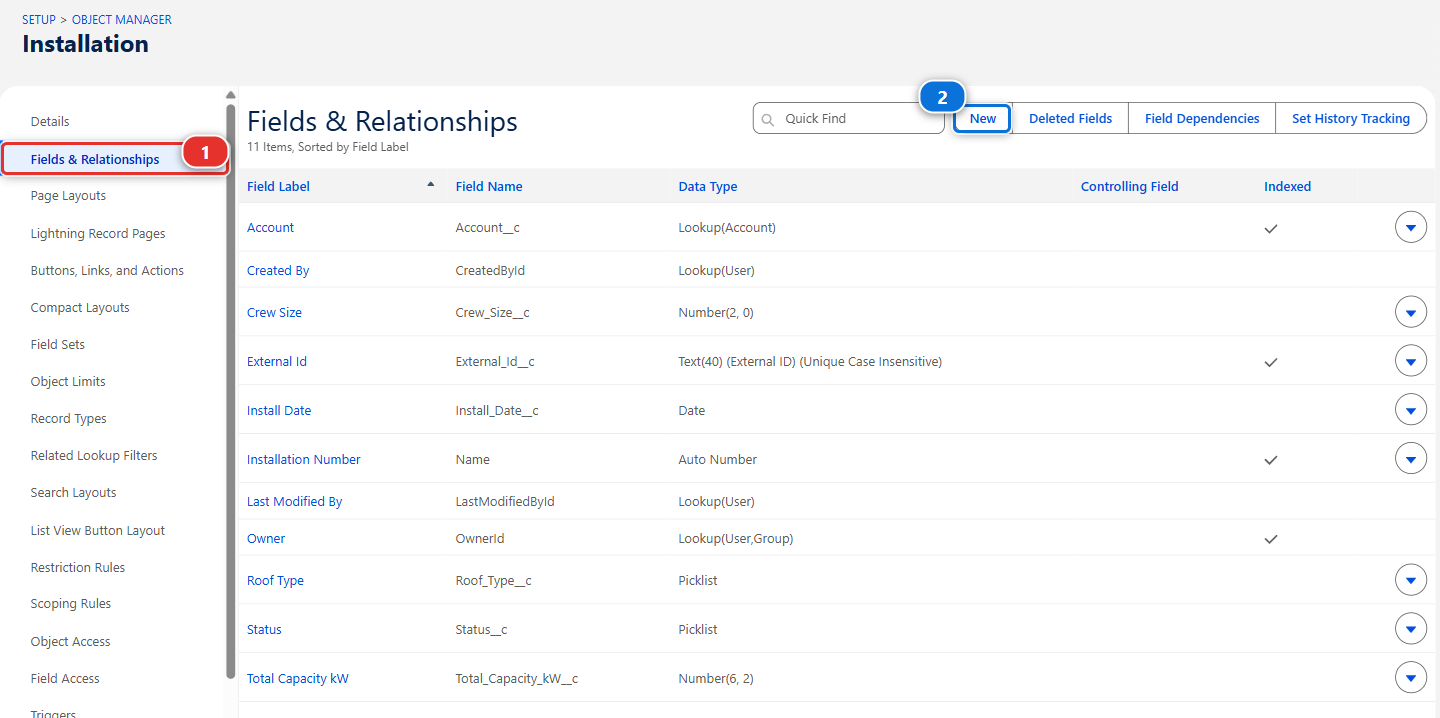
The list you see is the object before your change. Panels Required is what you are about to add
to it.
| Setting | Value |
|---|---|
| Data Type | Number |
| Field Label | Panels Required |
| Length | 4 |
| Decimal Places | 0 |
| Field Name | Panels_Required (Salesforce fills this from the label) |
| Description | How many panels the crew has to load for this installation. |
| Help Text | Ask the planner if this is empty. |
| Required | no |
The Field Name box is what Salesforce calls the API name, and it fills it from the label as you
type. It shows Panels_Required, without the __c: Salesforce adds that suffix to every custom
field when it saves, and the rest of this course, the metadata files included, calls the field
Panels_Required__c.
The field-level security screen arrives with Visible already ticked for nearly every profile. Clear them: the checkbox in the Visible column header toggles the whole column, so click it once to tick everything and again to leave nothing ticked. Then click Next. You are going to grant this through a permission set, not a profile, and Lab 2.6 is about why that distinction matters more than it looks.
On the page layout screen, Installation Layout is already ticked, which is what puts the field on the record. Leave it.
Click Save.
Fill in Description and Help Text
Two seconds now, and the generated project documentation at Lab 3.9 reads like something written by a person. Empty descriptions are the most common reason that documentation is useless.
3. Grant it to the crew, and to the planners
The acceptance criteria say the crew must see it, and planners must fill it in. Nobody has it yet, not even you: you granted nothing, and a field that no permission grants is invisible to everybody, the administrator who created it included.
Setup > Permission Sets > Helios Delivery Crew, then Object Settings (1) and Installations, then Edit.
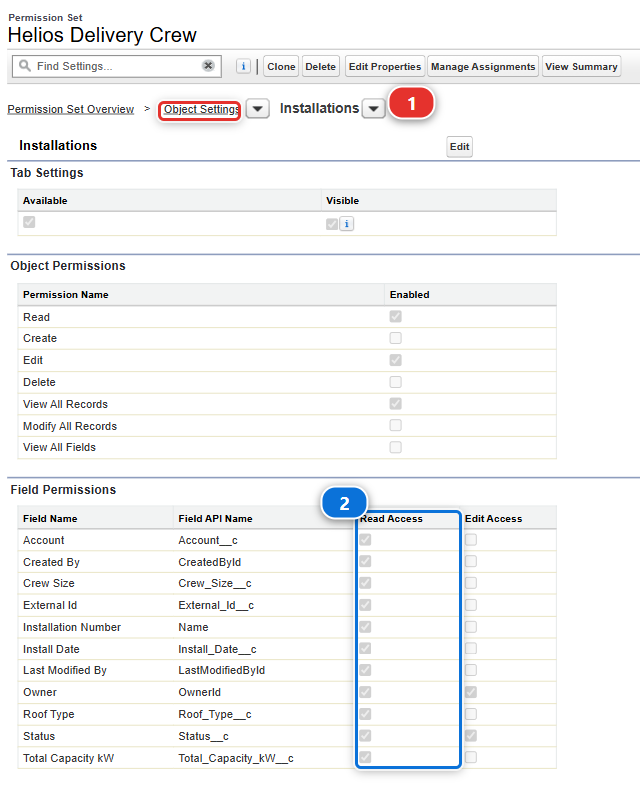
Field Permissions is the table that matters, one row per field, and Read Access (2) is
the column you are here for. This picture was taken before the field existed, so Panels Required
is not in it yet: after your change it appears in that list, in alphabetical order.
Find Panels Required and tick Read Access. Leave Edit Access unticked: a crew member
reads how many panels to load, they do not decide the number.
Save.
Then the same screens on Helios Delivery Manager, the planners' permission set. It is also the
one Set up my training environment gave you, which is how you see the Helios app at all. Tick
both Read Access and Edit Access on Panels Required: planners are the people who decide
the number. Save.
Skip this and step 4 shows you nothing: you would be looking for a field your own permission set does not grant.
4. Put it where people will look
The field is on the layout, which is what old-style Salesforce pages use. The Installation record page is a Lightning record page, and the column of fields on its left is that layout, so you are already done.
Open any installation (App Launcher > Helios Delivery > Installations, pick INST-00001) and
look at the bottom of that column. Panels Required is there, empty, with the small i of the
help text you wrote next to its name.
5. Test it against real data
Empty fields prove nothing. Put a number in.
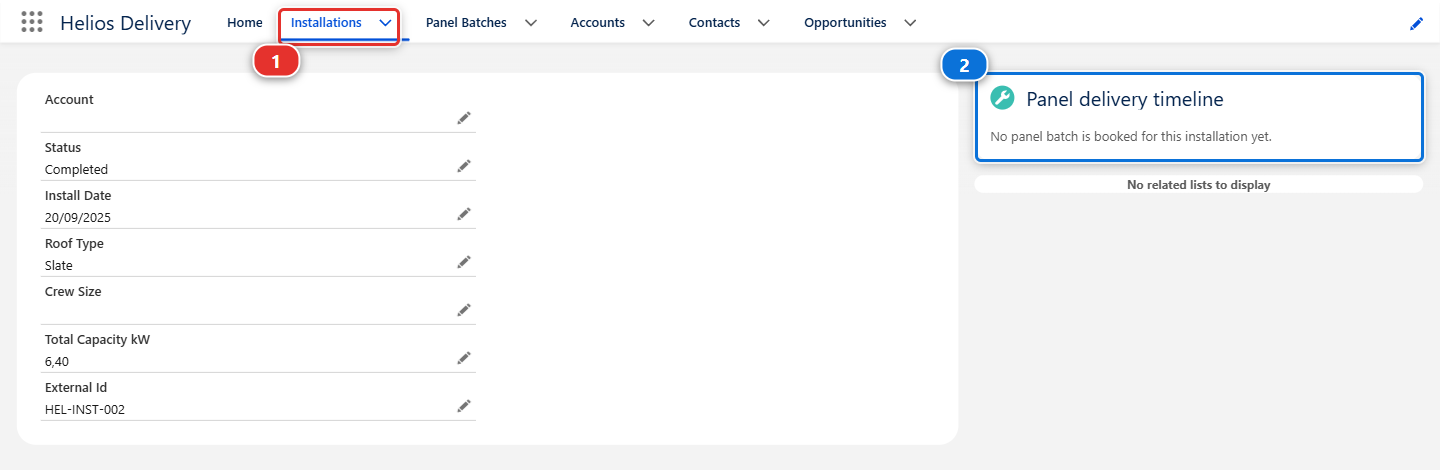
The Installations tab (1) is how you get back to this list from anywhere in the app. On the right of the record sits the Panel delivery timeline (2), which lists the pallets booked for this installation with their quantities. The picture was taken before this story existed, on an installation with no pallet booked, so there is no Panels Required in its column either. Most installations have two or three pallets.
- On
INST-00001, click the pencil at the right of Panels Required, type the number the timeline adds up to, and click Save at the bottom of the page. This page has no Edit button: every field is edited in place, with its own pencil - Look at the two numbers side by side. On a real story you would ask the planner whether this field should be typed in or worked out from the pallets. Here, typed in is the story, and that question is exactly the one a good contributor asks before building anything
Do the same on two more installations, so you have something to look at after the deployment.
What you should see
On three installations: a Panels Required value, visible in the column of fields, saved without
error.
And in VS Code, nothing at all. The repository does not know about any of this yet. Your changes live in one org and nowhere else, which is exactly the state Lab 1.5 exists to end.
If it goes wrong
Object Manager does not list Installation. You are in the wrong org. Check the Status section in VS Code, then reopen the org from Orgs Manager.
Orgs Manager shows your scratch orgs as disconnected, and offers Reconnect instead of Open. Older versions of the extension read only the connection probe, which a scratch org never carries: its Dev Hub answers for it instead. Update the extension, which is what Auto Update in Lab 1.1 is for, then click Refresh in the panel. The orgs are fine either way, and Reconnect would have signed you in again for nothing.
The field does not appear on the record page.
You skipped the page layout step. Setup > Object Manager > Installation > Page Layouts >
Installation Layout, drag Panels Required into the Information section, Save.
Save fails with a validation rule error. The Helios org has a rule that refuses moving an installation date into the past. If you edited the date by accident, put it back to a future date.
The permission set has no Object Settings for Installation.
A permission set only lists an object once something in it is granted. Use Field Permissions at
the top of the page instead: pick Installation there, and the object appears with its fields.
Check your work
Welcome page > Training: Level 1 > Check my work, then pick Lab 1.4.
Nothing of your work has left the org yet, so the check reads the org itself: it asks helios-dev
whether Panels_Required__c exists on Installation and whether Helios_Delivery_Crew can read it.
The repository learns about the field in the next lab.
Go deeper
Next: Lab 1.5 - Retrieve, commit and publish your Salesforce changes